Get updated Mirrix Looms blog posts at the new home of our blog: http://www.mirrixlooms.com/blog/
Enjoy!
Claudia & Elena of Mirrix Tapestry & Bead Looms

Get updated Mirrix Looms blog posts at the new home of our blog: http://www.mirrixlooms.com/blog/
Enjoy!
Claudia & Elena of Mirrix Tapestry & Bead Looms

When you’ve started to run out of thread, sew halfway back through the row before the one you just wove.

Tie a knot around one of your middle warp threads.

This knot will get hidden between the beads.

Then, weave that thread tail back through another few rows before trimming the end and making sure that end is hidden between the beads.

The thread has disappeared!

Start a new thread the same way. Sew through (making sure to sew starting from the correct direction so your new thread eventually ends up starting on the correct side for you to begin your new row. Tie a knot in the middle of a row that is already there and sew back up a few rows until you’re ready to begin your new row.

The new thread started!
Weave-Along 12: Jewel Cuff Bracelet
Starts December 1st

One Week Weave-Along – Make a gift fast!
Weave-Along 13 : Rag Mug Rug (or runner or rug… you choose the size)
Starts December 8th
Two Week Weave-Along
There will not be a kit for this weave-along.
You’ll need:
-Cotton or wool rags. Either strip material you already have: old clothes, sheets, fabric you never turned into the gorgeous sundress, etc. or by some brand new material from the fabric store (on sale of course). The strips should be about half an inch wide. Rip them, don’t cut them.
-Wool warp (our Navajo warp would be great) if you are using wool rags and cotton warp (The Woolery is a great source for this) if you are using cotton rags.
Tools:
-A Mirrix Loom with shedding device size 8 inch or up.
-A good beater. The heavier, the better.
Looking for the perfect gift?

For only $15 take our online Craftartedu class, the Crystal and Bead Wrap Bracelet with Claudia Anne Chase.
“In this beginner level CraftArtEdu class, learn how to weave beads on a loom to create a colorful wrap around bracelet. Follow Claudia Anne Chase’s detailed instruction on how to warp the loom, weave the bracelet and finish the bracelet. You will want to make dozens once you learn how.”
This class goes over all the details on how to weave this beautiful bracelet. Once you learn how, you can make tons of different unique bracelets. It’s a quick and easy project, and is a great introduction on how to weave beads on a Mirrix Loom. You’ll learn how to warp, weave with different sized beads and crystals and finish this great piece.
You can purchase the kit here. You can make at least two bracelets from this kit.

Enjoy!
I made a zillion of these and then gave most of them away. I was in one of those moods. This bracelet weaves up very quickly. It probably takes longer to finish (attach to cuff and embellish) than it does to weave. I would say total time to weave and finish is about two and a half hours, which makes it a “not-slow project” so great for those of you who have a lot of gifts to whip up for girls/women this holiday season. The kit, which I haven’t put together just yet (give me a day or so) will include enough materials to make two cuffs. Below are two examples. One without embellishment beads along the edge and one with. Obviously, the one without embellishment beads will take less time to finish. I like them both. If you are not going to be embellishing with beads along the edge, you need to be very careful with stitching the beaded piece to the cuff. In any case, once on a wrist, those stitches will barely show but the cuff will not always be on someone’s wrist and you want it to look good then too.


I have been playing (slowly) with hand painted silk. The eyeglass case, which is still on the loom, is now not wanting to be an eyeglass case. More about that tomorrow when I take it off the loom.
To find the silk go to: http://www.mirrixlooms.com/store/silkandgoldkit24.html That’s the big pack and best deal if you want to make a larger piece.
The first strip of silk is done. The other, almost done, is still on the loom. It’s hard to fail. Use any color of our hand painted silk in any order and it will be just right. I added a few rows of beads here and there. The sett was 14 ends per inch, so I used size 11/0 beads.


I crocheted this purse. It was actually a piece I made many months ago. I had made a bunch of these, but is the only one I kept. I added a row of magnatama beads and finished it with a braided strap. Number of hours to make? Who knows, but quite a lot. I wasn’t counting.


Now for the embroidery. This one you might have seen before. It probably took about sixty hours to make and my hands did get sore doing it so I had to take many breaks to do other things. I think the creation time spanned about eight months.

What follows are details of another embroidery I just finished. This one took even longer. But at some point I knew I was finished. I have two more that are almost completed.


And then there is the knitted scarf (a Christmas present). Whenever I joined two colors, I tied an overhand knot and strung crystals or porcelain beads on the thread ends. It was a great way to nicely hide those ends and add some interesting accents.


Now back to finished the “not going to be an eyeglass case!”
I am going to start off this post the way I originally planned to start it which is: Looking for a quick and easy project to give away as a gift, something you can make in an hour or two and make a whole bunch of? Well, then this project is NOT for you . . .
That’s the way this post was supposed to begin, but now I am forced to digress madly. Recently, my job at Mirrix has been to make things. Elena thinks I should be designing projects every waking moment (in between the basic stuff of running Mirrix). If she had her way I’d be designing a new kit every other day! But am I complaining? I wrote down a bunch of our ideas and then while stewing about them I randomly decided to weave a long strip of hand-painted silk just because I wanted to. In fact, it will be two strips because I wanted to weave it on the eight inch loom, I wanted it in my lap sometimes and I didn’t want to use the loom extenders with the 12 or 16 inch loom because I wanted that “in your lap intimate” experience. Even before I started weaving the strip I realized I could use it for a strap for this “failed” tapestry that became a purse but whose strap had gone missing. I don’t think it was a very good strap but the purse . . . well, as I said, it was a failed tapestry but it was one intricate piece of tapestry. Not the kind of thing you would ever weave to make a purse. Oh, darn, now I have to photograph it. Wait a minute while I do that.
Okay, just took a couple pictures of the purse (and please pardon my photographs . . . my photo tent is officially dead and I am waiting for the new one to arrive. . . so it’s hard to get the light correct but I am too impatient to wait for the ten to post this blog post!) . . .
This is the front. I think the tapestry was going to be a garden of sorts. It was a very long time ago that I wove it and I only just discovered the purse hiding underneath a pile of tapestries that hadn’t met their goal.

This is the back.

Don’t want to lose my thread here. So while contemplating new kits I, as I said, decided to weave this strip which I then realized I could use as a strap for above purse. Let me show you the strip:


I didn’t use the shedding device. It’s not done yet, so I should put that in the present tense. In any case, I needle weaving it because I wanted to feel that very rhythmic movement of under and over with a needle. There is something very primal about that. But I had promised Elena I would come up with a Christmas ornament, which leads me to another digression because she asked if I had every made one before and I replied: “Yes, I made one for the White House Christmas tree when Clinton was president.” I think she was a little surprised by that answer. The deal was, members of the NH League of Craftsmen were asked that year to make an ornament for the White House Christmas tree, so I did. I have no photographs of it and I can’t even remember what it looked like. But I do know I made it and I do know it hung on the White House Christmas tree for at least one season and now is probably buried in a box somewhere.
After we spoke I warped an eight inch loom with shedding device. The warp spanned about two and a half inches. The idea was to weave a five inch strip and then fold it over. Elena wanted me to weave in some standard Christmas image, which I knew I would not do and she knew I would not do! I loved weaving this piece, but before I even show you the pictures, I need to return to my original theme: Slow art/craft. After I wove the ornament I said to Elena: there should be something called “slow craft.” I thought I had just made up a new trend and then this morning I found out courtesy of the internet that indeed someone got there before me. Well, in reality it is an old theme. It’s the theme of tapestry weaving essentially. I mean, you just can’t rush a tapestry and if yo are sitting there counting your hours while you weave because you want to actually make money by selling it someday . . . forget it. Tapestry isn’t like that.
I think there are two ways to approach craft/art, whatever you want to call it. There is the quick easy approach. The “I want to make a dozen of these things to give to friends and family at Christmas or to sell at the local craft fair or even in some high end gallery . . . the point being, the final object becomes almost more important than the journey. Sure, you may still have fun making it, but that is not the entire goal. With my strip though the goal was to enjoy making it. The goal was not to rush. The goal was the experience itself. Hence the thought “slow craft,” came to mind and clearly it came to other minds as well!
I decided the Christmas tree ornament was going to be a slow craft too. I wanted to play with my hand painted silk. I wanted to see how it would weave up in a wider strip.

Before I folded the piece together, I embellished each side.


I then sewed up the sides, embellished with beads, added a braid to hang it . . . eight hours later I had my “slow craft” Christmas Ornament. I imagine I will only make one because my next project is to make a “slow craft” eyeglass case, again out of hand painted silk.
In short, I am on a slow craft adventure. I have done my time making work to sell in galleries. I know I owe several wrap bracelets to one gallery and even though I love making them, I don’t know if I am in the mood. I am in the mood to slowly and patiently weave row upon row of hand painted silk and then turn it into something that can be used or seen. I want the experience itself. And when you want that, you often don’t even want it to end. I always mourned the finishing of a large tapestry. What would be next? My life had been somewhat regulated by this constant theme of a large tapestry in progress and then when it was done I had to find something to replace it.
So . . . slow craft, slow art. Even if I didn’t make it up, I am going to be talking about it a lot. Next post is going to be about my “slow scarf”.
I dug through my stash of bead woven pieces and found some surprises. I am sure there are pieces hiding in other places, which I will post at a later date, but for now this is what I found:
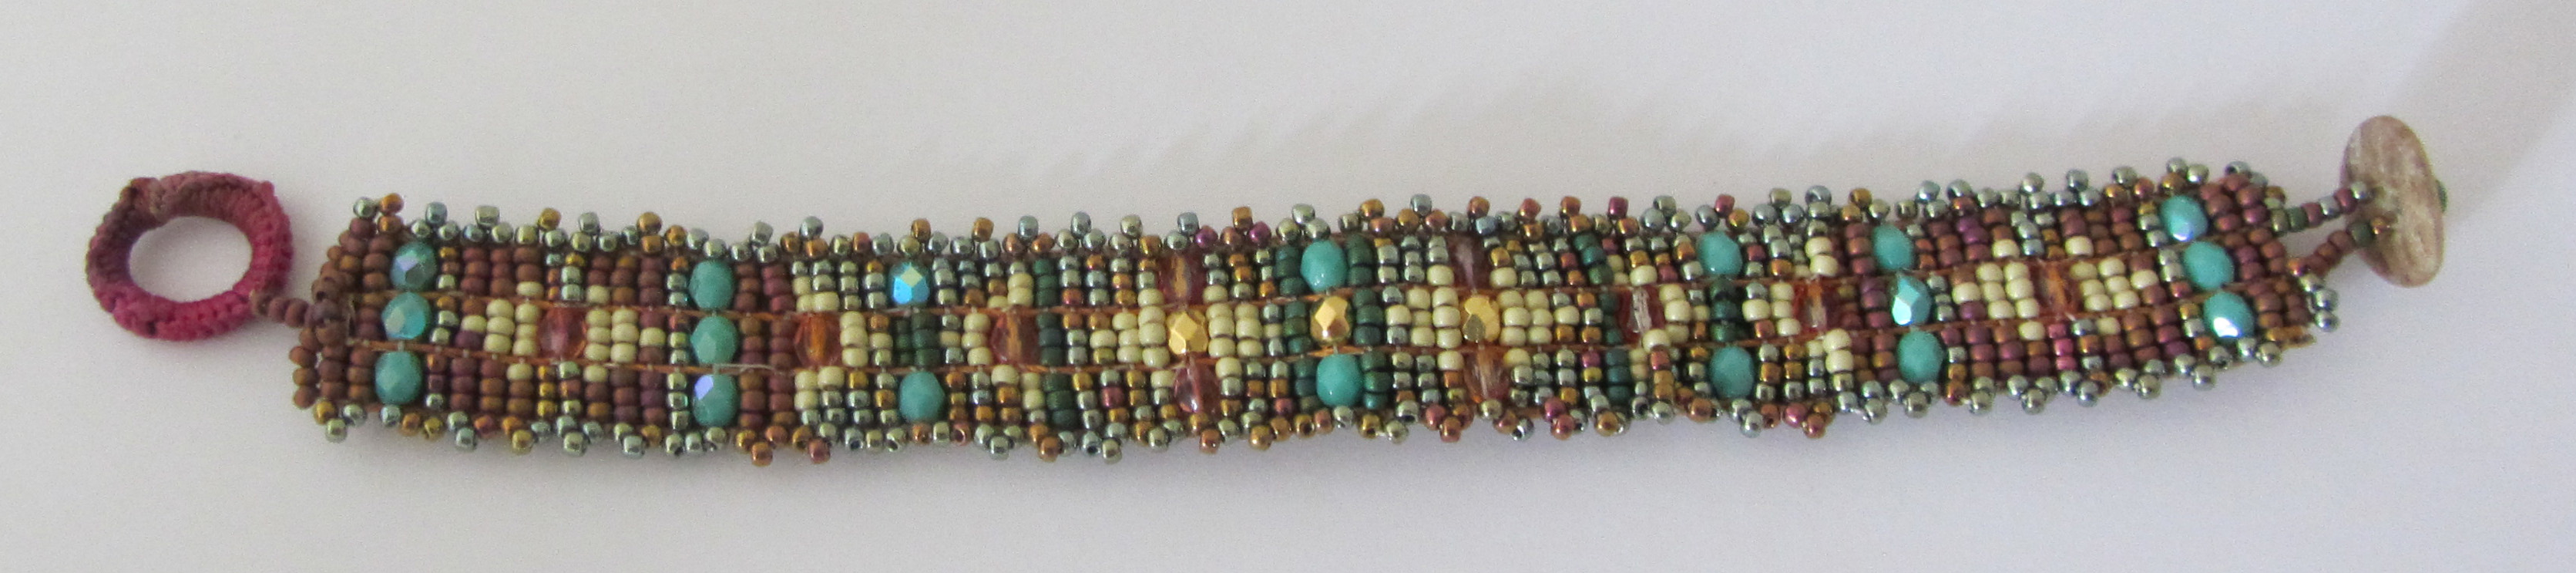
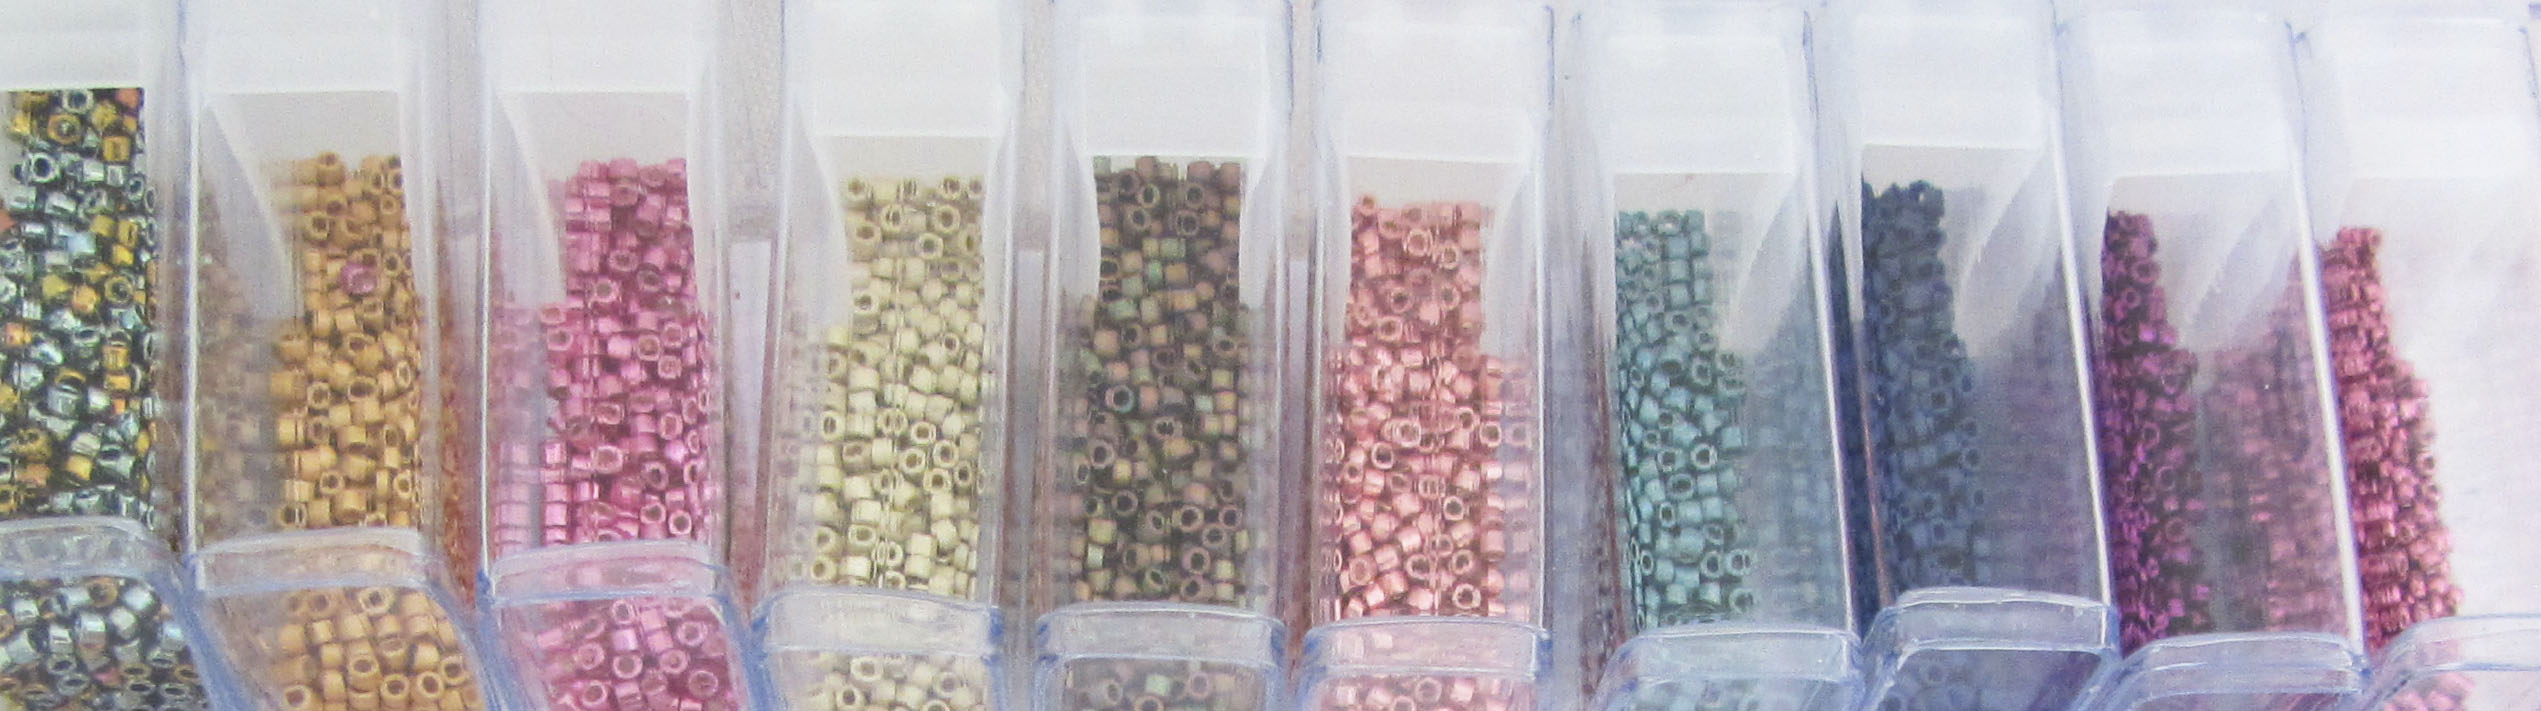
I remember really enjoying weaving this piece. I made piles of 11/0 Delica beads in colors I thought might dance well together. Then I just wove various designs with these colors. I had twelve spaces (because there were thirteen warps) to play with. It’s amazing how many designs one can managed with just twelve spaces and bunch of colors. I folded the button end over and sewed it to the back of the piece to disguise the warp ends (which were tied with overhand knots). I buried those ends under the fold. I then made a peyote tube and attached a tube to it for the button. The triangle (which was made with a combination of peyote and herringbone stitch) buried the other end of the bracelet since it is actually two sided.

I combined matt finish beads with metiallic finish beads so that the individual colors stand out.

I stuck an interesting crystal to the end of the peyote tube.

I don’t know if I could make that triangle again, but I sure do like the look!

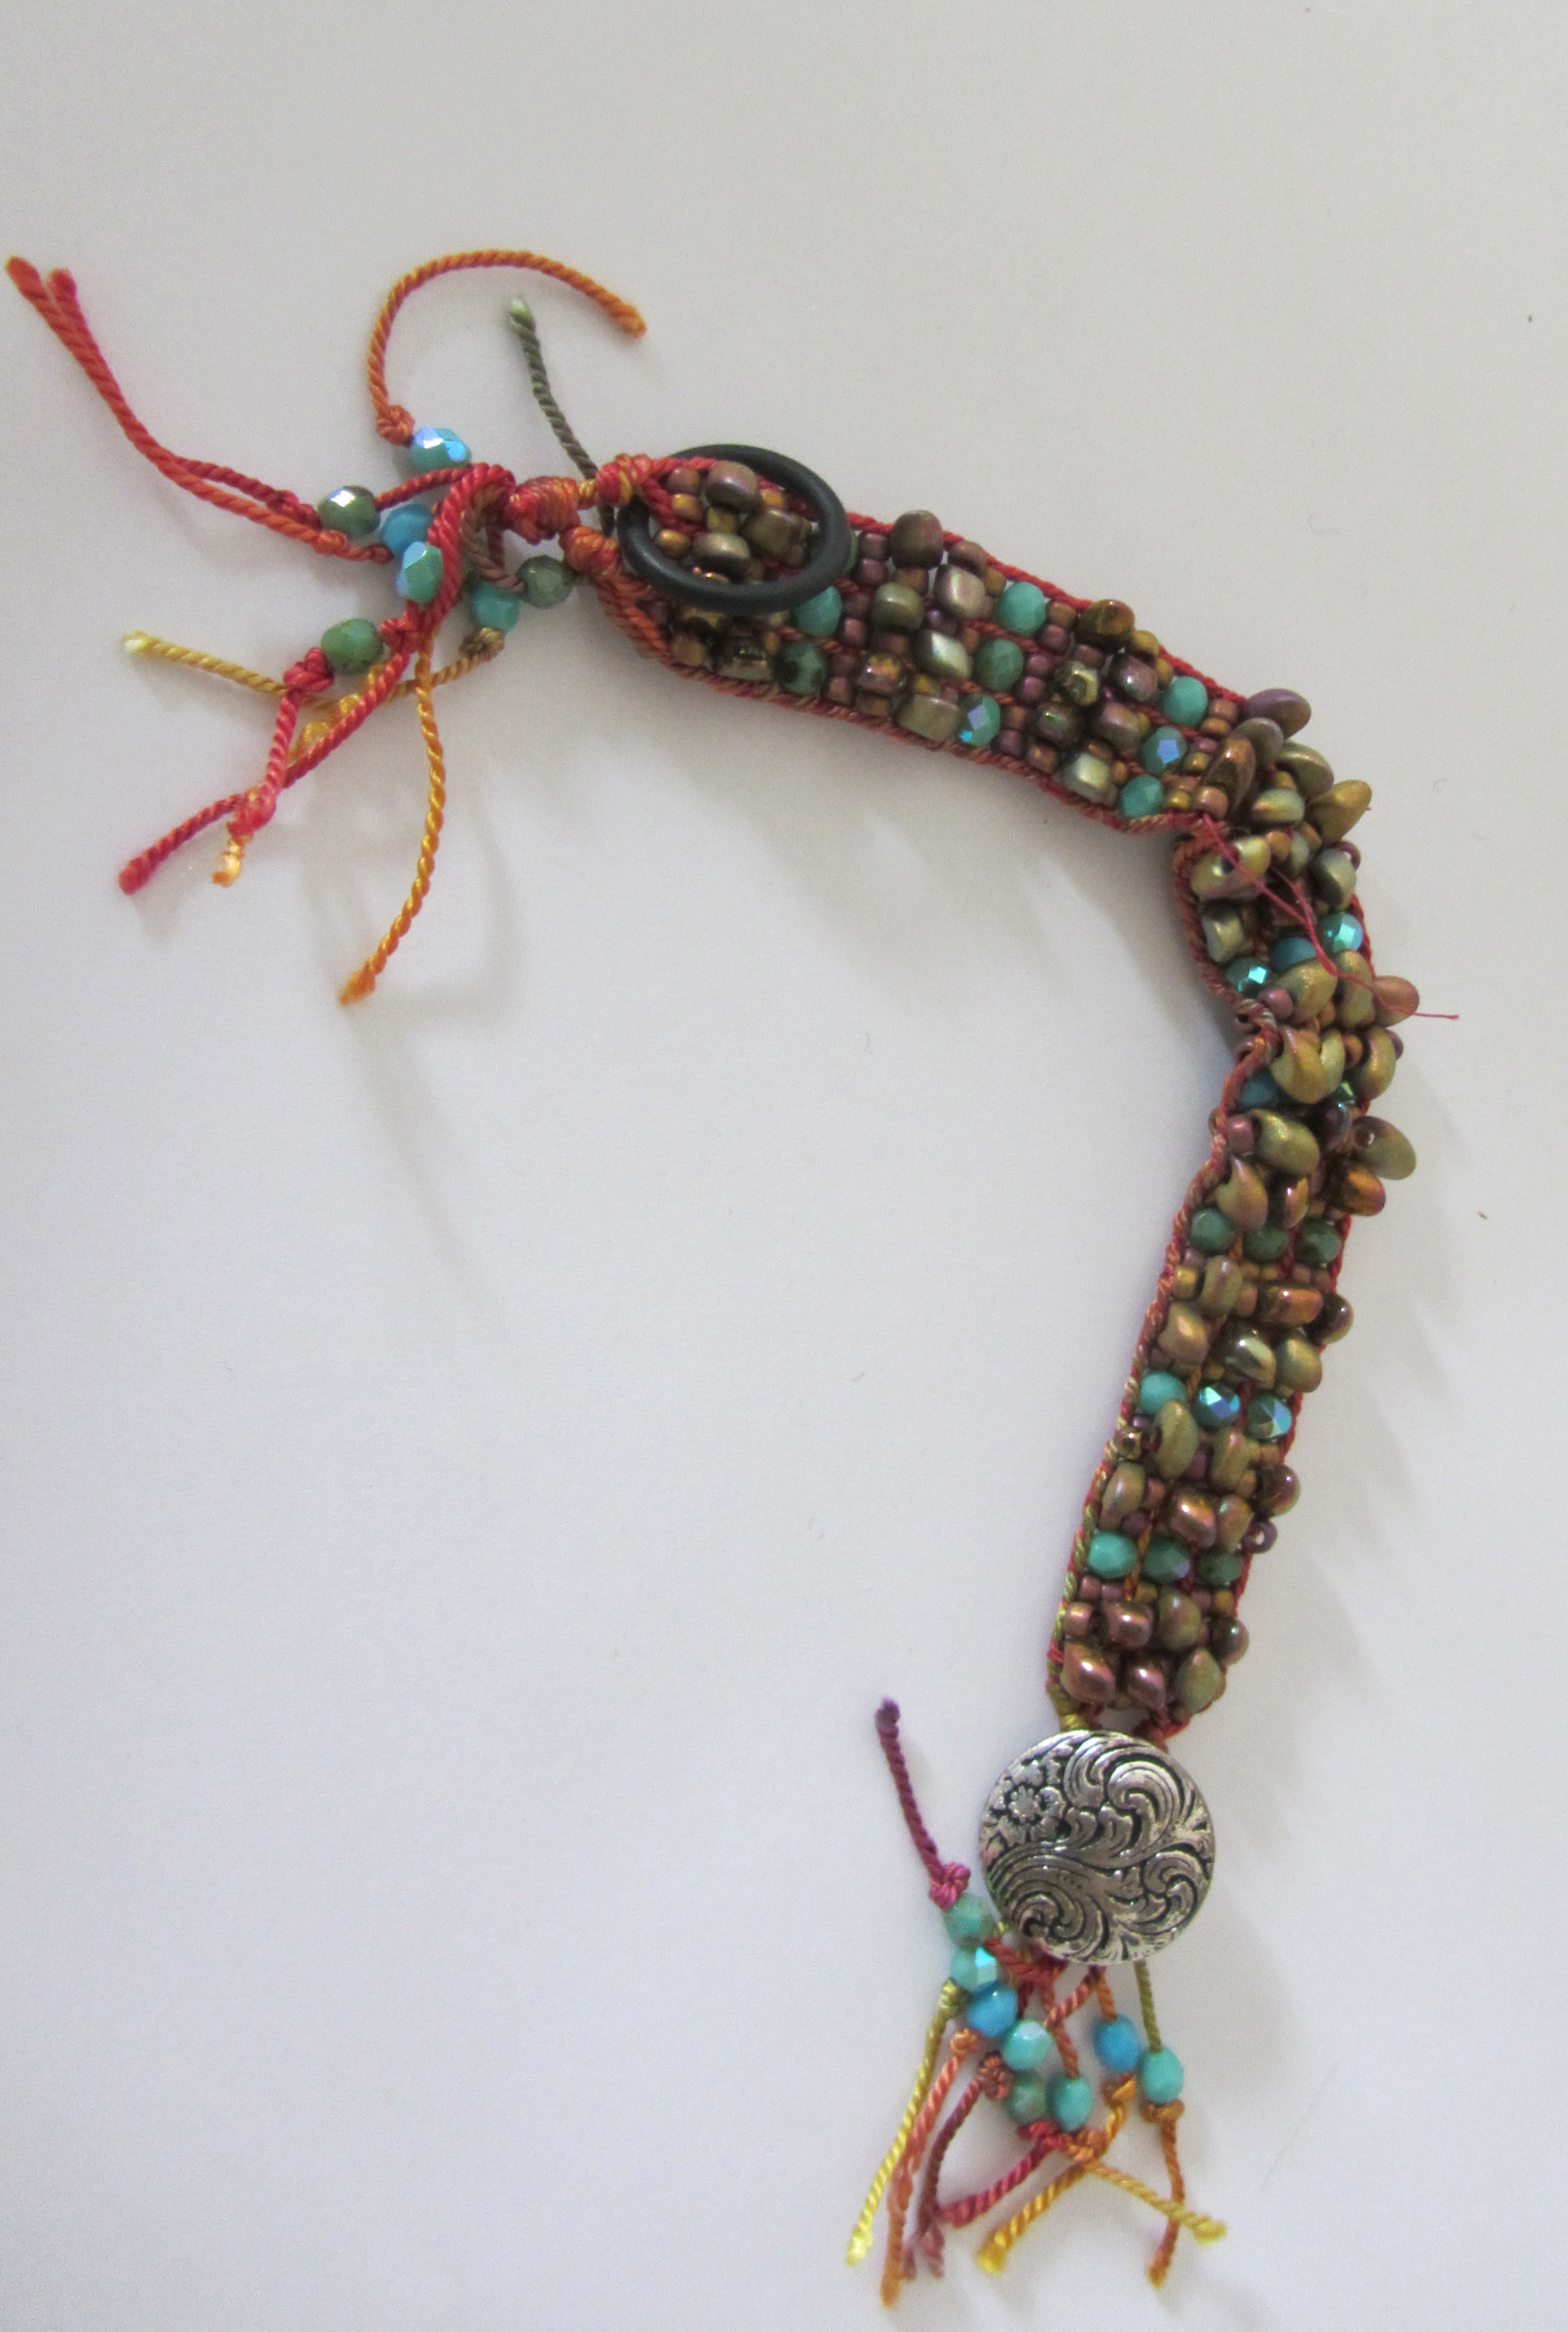
This next little gem is a one wrap bracelet made with beads and crystals. I hadn’t figured out yet that the O-ring should be covered with hand painted silk. I like the addition of crystals on all the warp ends. It was the start of something beautiful (the crystal and bead wrap bracelets that followed).
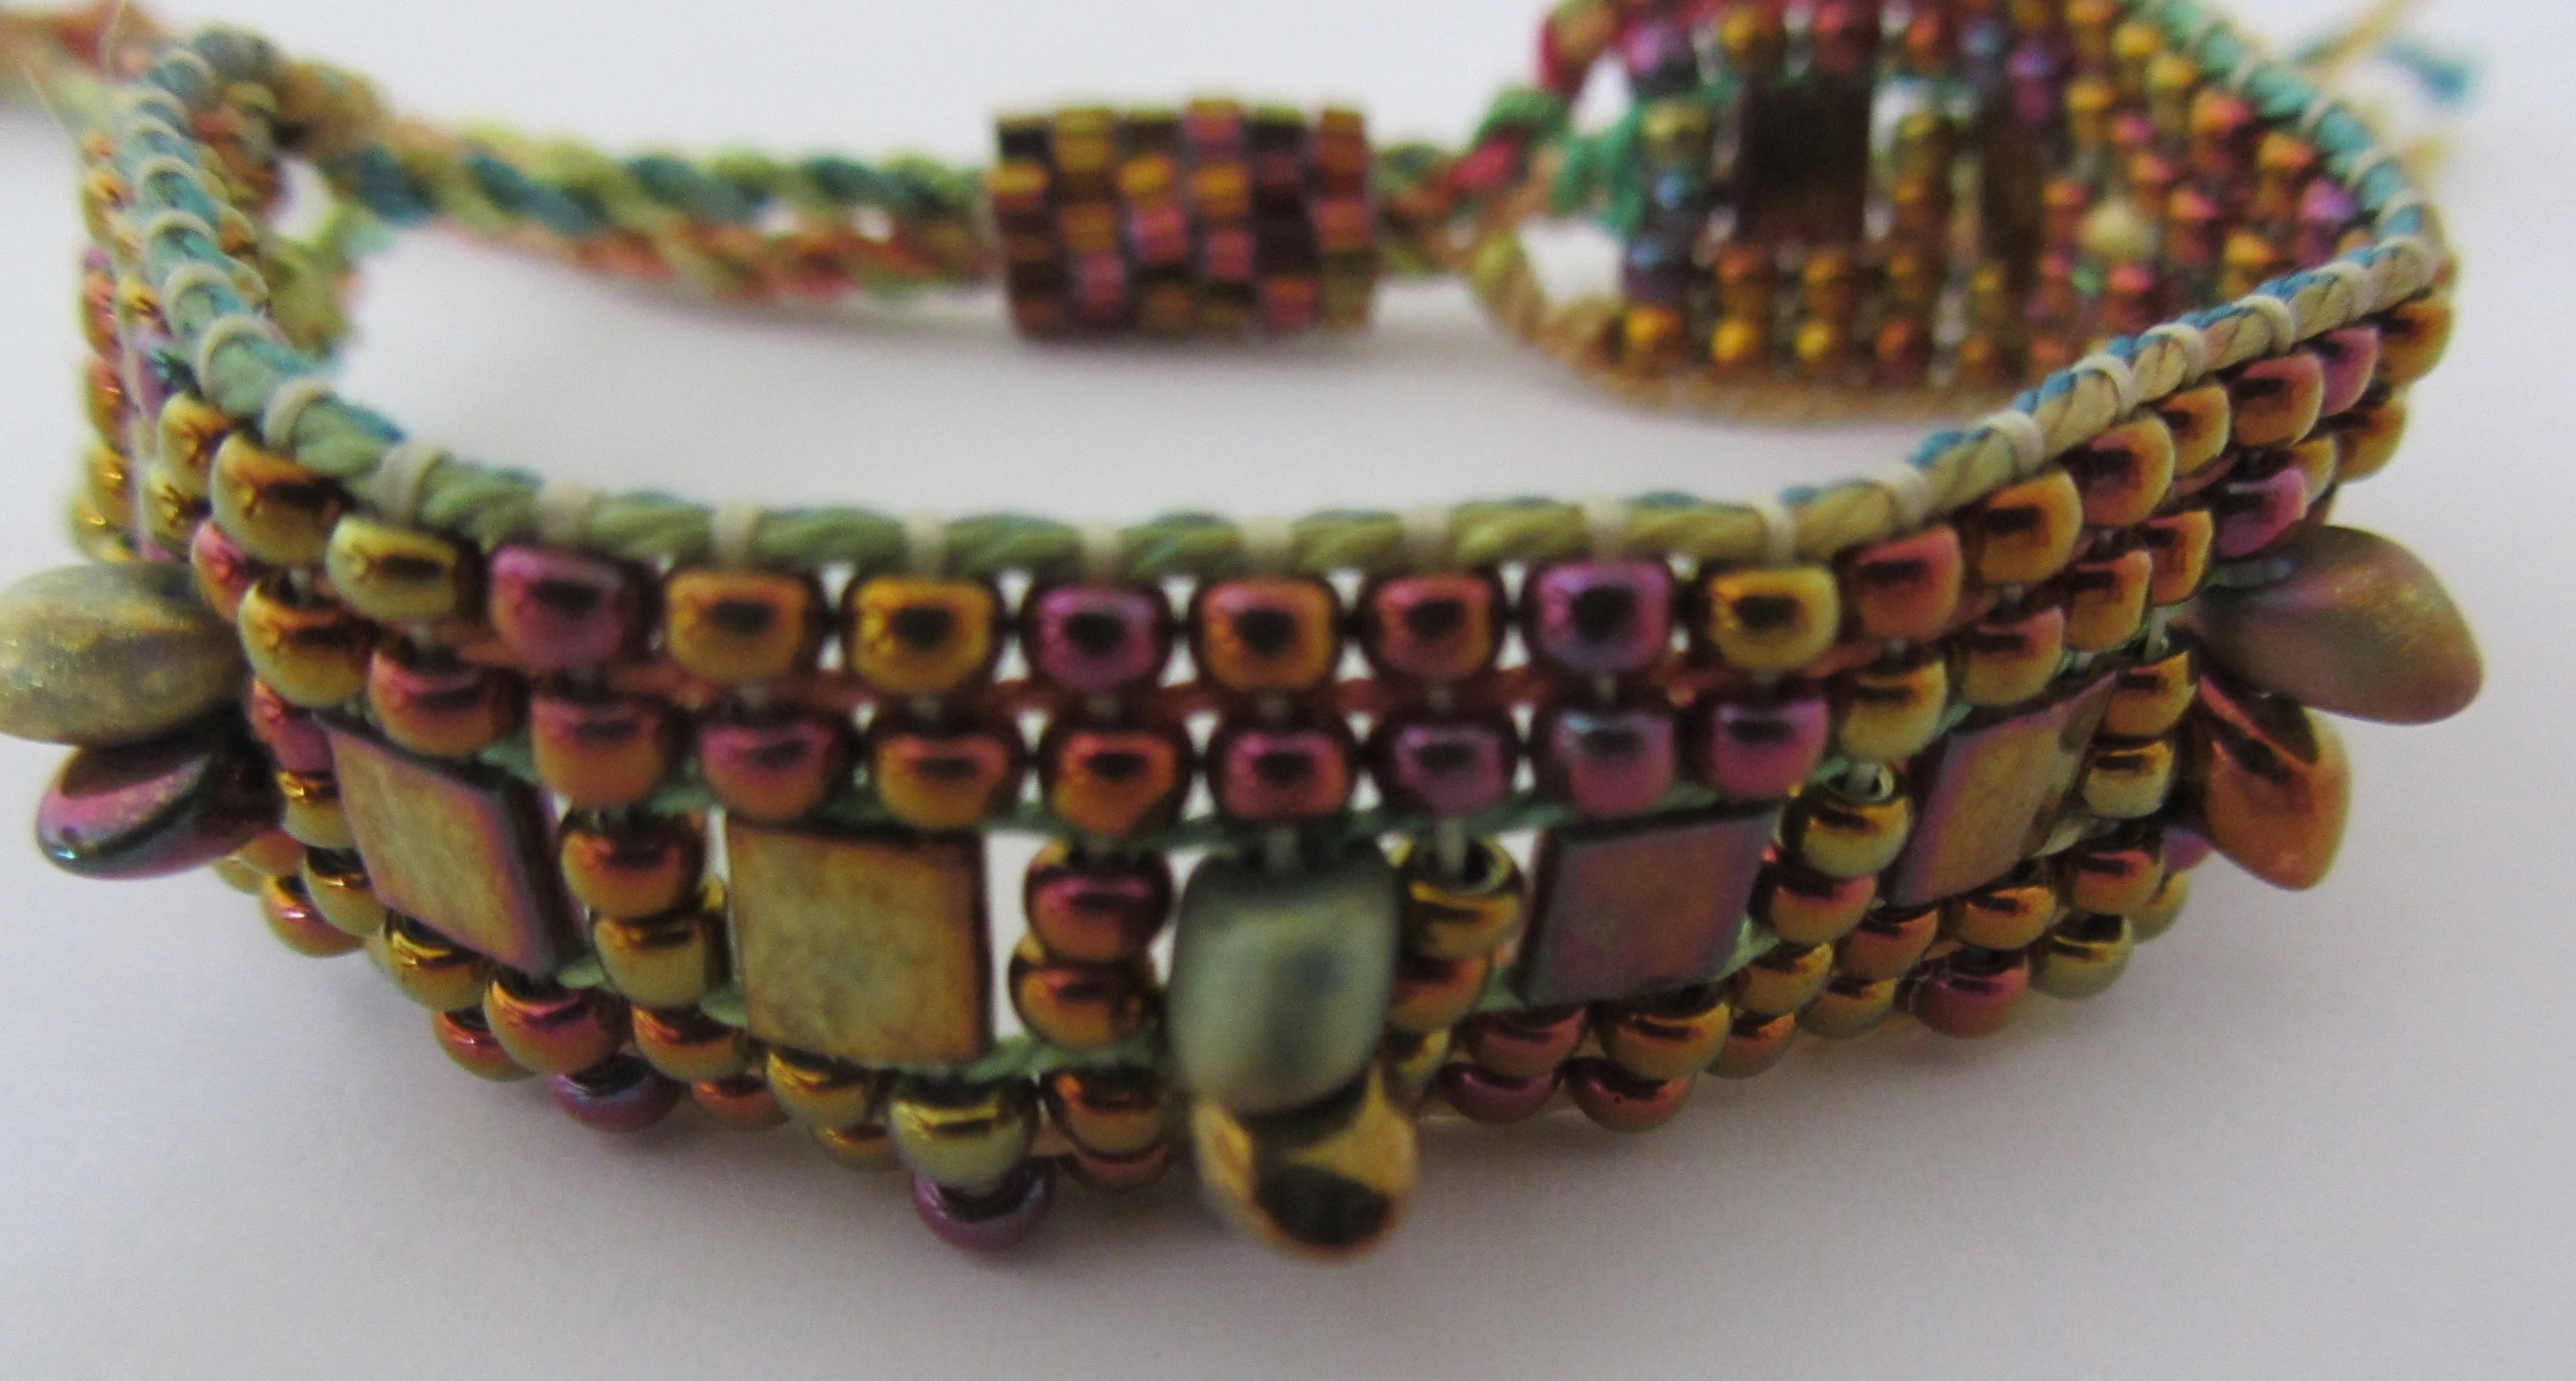
Wow, this is an old one. The loom held four warps (which surround the square beads). The trim on the ends (three size 11/0 beads) was put on as I wove. I then somehow crossed the interior beads, which are all strung at once. The warp was something fairly heavy like C-Lon beading cord 135. I don’t know why it never became a kit. Maybe it should!


This bracelet is similar to the one above, but the inside rows are not crossed.


I had been making a bunch of bracelets to put on a brass cuff. But with this one I lined the back with ultra-suede (gets rid of all those pesky warp ends in a hurry plus is very comfortable to wear).

This next one is a variation of the affinity bracelet theme.
This funny little guy uses a silk covered O-ring as both button and closure. I’ll try anything once. I might even try this again.

You know how much I love checkerboards!


This is my latest bracelet (I made it yesterday) and it might want to become a kit. Bicone crystals on a hand painted silk warp. A few knots, a few more crystals, the usual hand painted silk covered O-ring (as well as warp) and pewter button. I think it took me an hour to weave and about twenty minutes to finish. Fun and easy. Should it become a kit?


We want to know what gifts you are making/have made this holiday season on your Mirrix!
Submit pictures of and information about an original piece you made on a Mirrix Loom (pieces cannot be based off a pattern or design made by or purchased from anyone else).
One (1) picture of the finished piece is required (.jpg or .gif format, at least 200 x 200 pixels), but you can submit as many as five (5) pictures. At least one (1) picture of the piece on the loom is encouraged. Include some basic information about your piece including the size, use, materials and why you think it makes a good gift.
We will be posting submissions as we get them as inspiration and some will go in our “Your Work” gallery! Get your gift-making on!
How to Enter: Email elena@mirrixlooms.com with (a) picture(s) and a description of your piece (like described above) as well as your FULL name, email address and mailing address. Email subject must be: Gift Made on a Mirrix.
All entries must be submitted by midnight December 31st, 2013.
How to Win: Claudia Chase and Elena Zuyok will choose the winning entry based on originality (25%), creativity (50%), complexity (10%) and use of color (15%). Quality of pictures and description of the gift will also contribute to the final choice.
The Prize: 24 bobbins of silk and gold ($115 value) or a $100 gift certificate to be applied to a purchase of $200 or more (the winner can choose). Gift certificate is valid for 1 (one) year after it is received.
The Rules:
NO PURCHASE NECESSARY. A VALID E-MAIL ADDRESS IS REQUIRED.
1. ELIGIBILITY: Employees, officers and directors (and their immediate families) of Mirrix Tapestry & Bead Looms, their respective parents, subsidiaries, affiliates, agencies are not eligible.
2. Any winner outside of the continental USA must pay for shipping.
3. By submitting an entry, contest participants are assuring that all work done is their own and no copyrighted material is being used. Pieces must be original. They cannot be based off a pattern or design made by or purchased from anyone else.
4. Entry Restrictions. Limit one (1) entry per person. Entrants must be over the age of 18.
5. FORCE MAJEURE. If, for any reason, the contest (or any part thereof) is not capable of running as planned by reason of computer virus, bug, system malfunction, tampering, unauthorized intervention, fraud, technical failures, fire, flood, storm or other natural cataclysm, riot, strike, civil commotion, governmental regulation or any other causes beyond the control Mirrix Tapestry & Bead Looms which, in its sole opinion, corrupt or affect the administration, security, fairness, integrity or proper conduct of the contest (or any part thereof), Mirrix Tapestry & Bead Looms reserves the right at its sole discretion to cancel, terminate, modify or suspend the the contest and select the prize winner in a manner which is fair, equitable and in accordance with these Official Rules.
6. By entering this contest, participants agree that their entry can be shared and posted publicly by Mirrix Looms on their website, blog, Facebook, Twitter, Pinterest and other social sharing sites and can be used in any Mirrix advertising.
7. DISPUTE RESOLUTION/GOVERNING LAW. To the fullest extent permitted by law, by participating in the contest, you agree that: (a) any action at law or in equity arising out of or relating to these Official Rules or this contest shall be filed exclusively in the federal or state courts of Hillsborough County, New Hampshire and you hereby consent and submit to the personal and exclusive jurisdiction of such courts for the purposes of litigating any such action; (b) any such action shall be resolved individually, NOT as part of a class action; (c) any claims/judgments/awards shall be limited to actual out-of-pocket costs incurred (if any), but NOT attorneys’ fees. These Official Rules and this Sweepstakes shall be governed by the internal, substantive laws of the State of New Hampshire.
8. Any entry may be denied and any entrant may be disqualified based if seen fit by Mirrix representatives.
9. Mirrix concepts, such as the Tapestry/Bead Cuff Bracelet or the Affinity Bracelet can be submitted, but original materials must be used.
1) She has beads everywhere… in the car, on top of the washing machine, in her bedside table…
2) When he’s at a museum, he never gets past the textile section.

3) He’s thought about making his own loom… but it’s a little overwhelming.

4) She spends a good portion of her free time pinning DIY craft projects on Pinterest.

5) She finds beauty in everything and always thinks… “Wouldn’t that make a great bead pattern?”

6) He has secret yarn stashes (but everyone knows about them).

7) Even her place settings are a work of art.

8) He’s always knitting or beading or sewing… even the dog gets homemade gifts. 
9) She makes gorgeous beaded jewelry, and you know she’d love to add weaving on a loom to her list of skills.

10) The background on her phone is a picture of a Mirrix.

Pass this on and visit www.mirrixlooms.com for more information on our looms, kits and accessories!

