How to start a new thread when weaving beads

How to start and end your threads when you run out when weaving with beads on a Mirrix Loom:


When you’ve started to run out of thread, sew halfway back through the row before the one you just wove.


Tie a knot around one of your middle warp threads.


This knot will get hidden between the beads.


Then, weave that thread tail back through another few rows before trimming the end and making sure that end is hidden between the beads.


The thread has disappeared!


Start a new thread the same way. Sew through (making sure to sew starting from the correct direction so your new thread eventually ends up starting on the correct side for you to begin your new row. Tie a knot in the middle of a row that is already there and sew back up a few rows until you’re ready to begin your new row.


The new thread started!

A New Class

Looking for the perfect gift?

wrap bracelet on hand

For only $15 take our online Craftartedu class, the Crystal and Bead Wrap Bracelet with Claudia Anne Chase.

“In this beginner level CraftArtEdu class, learn how to weave beads on a loom to create a colorful wrap around bracelet. Follow Claudia Anne Chase’s detailed instruction on how to warp the loom, weave the bracelet and finish the bracelet. You will want to make dozens once you learn how.”

This class goes over all the details on how to weave this beautiful bracelet. Once you learn how, you can make tons of different unique bracelets. It’s a quick and easy project, and is a great introduction on how to weave beads on a Mirrix Loom. You’ll learn how to warp, weave with different sized beads and crystals and finish this great piece.

four bracelets

57


You can purchase the kit here. You can make at least two bracelets from this kit.

crystal bead and wrap bracelet


Enjoy!

Next Weave along: Crystal and Bead Cuff Bracelet

I made a zillion of these and then gave most of them away.  I was in one of those moods.  This bracelet weaves up very quickly.  It probably takes longer to finish (attach to cuff and embellish) than it does to weave. I would say total time to weave and finish is about two and a half hours, which makes it a “not-slow project” so great for those of you who have a lot of gifts to whip up for girls/women this holiday season.  The kit, which I haven’t put together just yet (give me a day or so) will include enough materials to make two cuffs.  Below are two examples.  One without embellishment beads along the edge and one with.  Obviously, the one without embellishment beads will take less time to finish.  I like them both.  If  you are not going to be embellishing with beads along the edge, you need to be very careful with stitching the beaded piece to the cuff.  In any case, once on a wrist, those stitches will barely show but the cuff will not always be on someone’s wrist and you want it to look good then too.

ImageImageImageImageImageImage

Retrospective, sort of

I dug through my stash of bead woven pieces and found some surprises.  I am sure there are pieces hiding in other places, which I will post at a later date, but for now this is what I found:

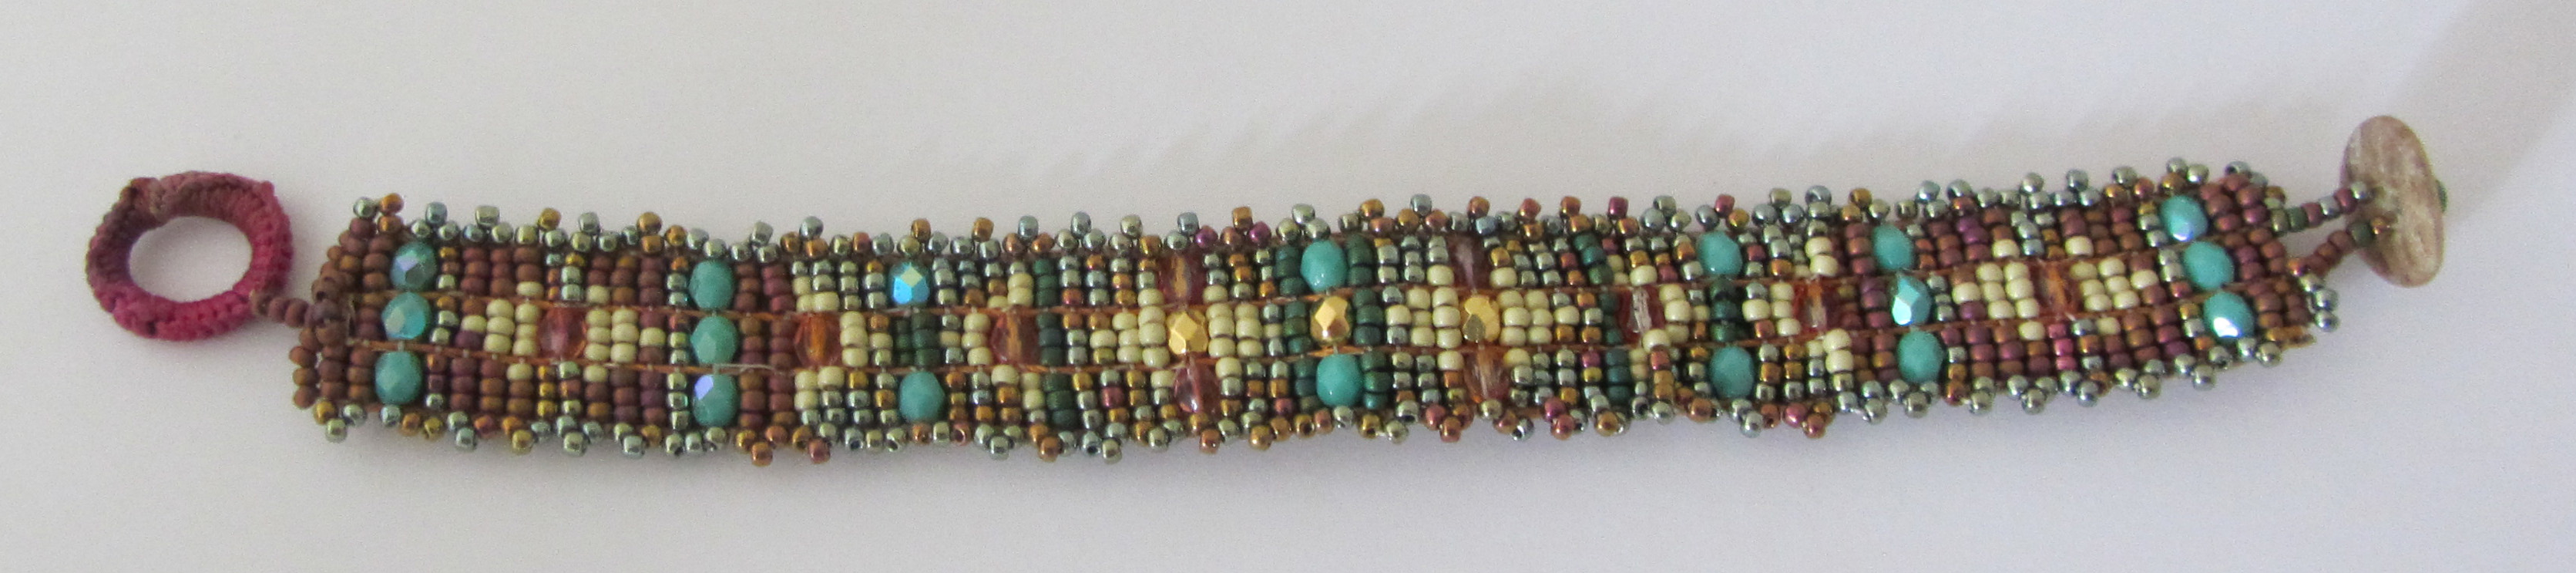
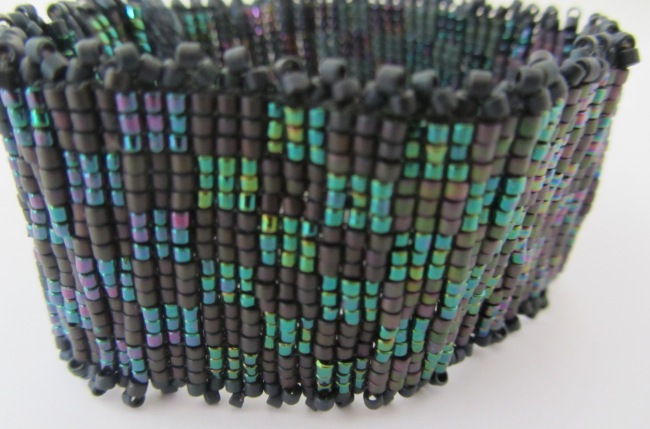
I remember really enjoying weaving this piece.  I made piles of 11/0 Delica beads in colors I thought might dance well together. Then I just wove various designs with these colors.  I had twelve spaces (because there were thirteen warps) to play with.  It’s amazing how many designs one can managed with just twelve spaces and bunch of colors.  I folded the button end over and sewed it to the back of the piece to disguise the warp ends (which were tied with overhand knots).  I buried those ends under the fold.  I then made a peyote tube and attached a tube to it for the button.  The triangle (which was made with a combination of peyote and herringbone stitch) buried the other end of the bracelet since it is actually two sided.

Image

I combined matt finish beads with metiallic finish beads so that the individual colors stand out.

Image

I stuck an interesting crystal to the end of the peyote tube.

Image

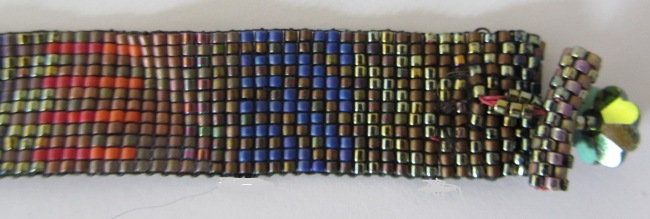
I don’t know if I could make that triangle again, but I sure do like the look!

Image

This next little gem is a one wrap bracelet made with beads and crystals.  I hadn’t figured out yet that the O-ring should be covered with hand painted silk.  I like the addition of crystals on all the warp ends.  It was the start of something beautiful (the crystal and bead wrap bracelets that followed).

Image

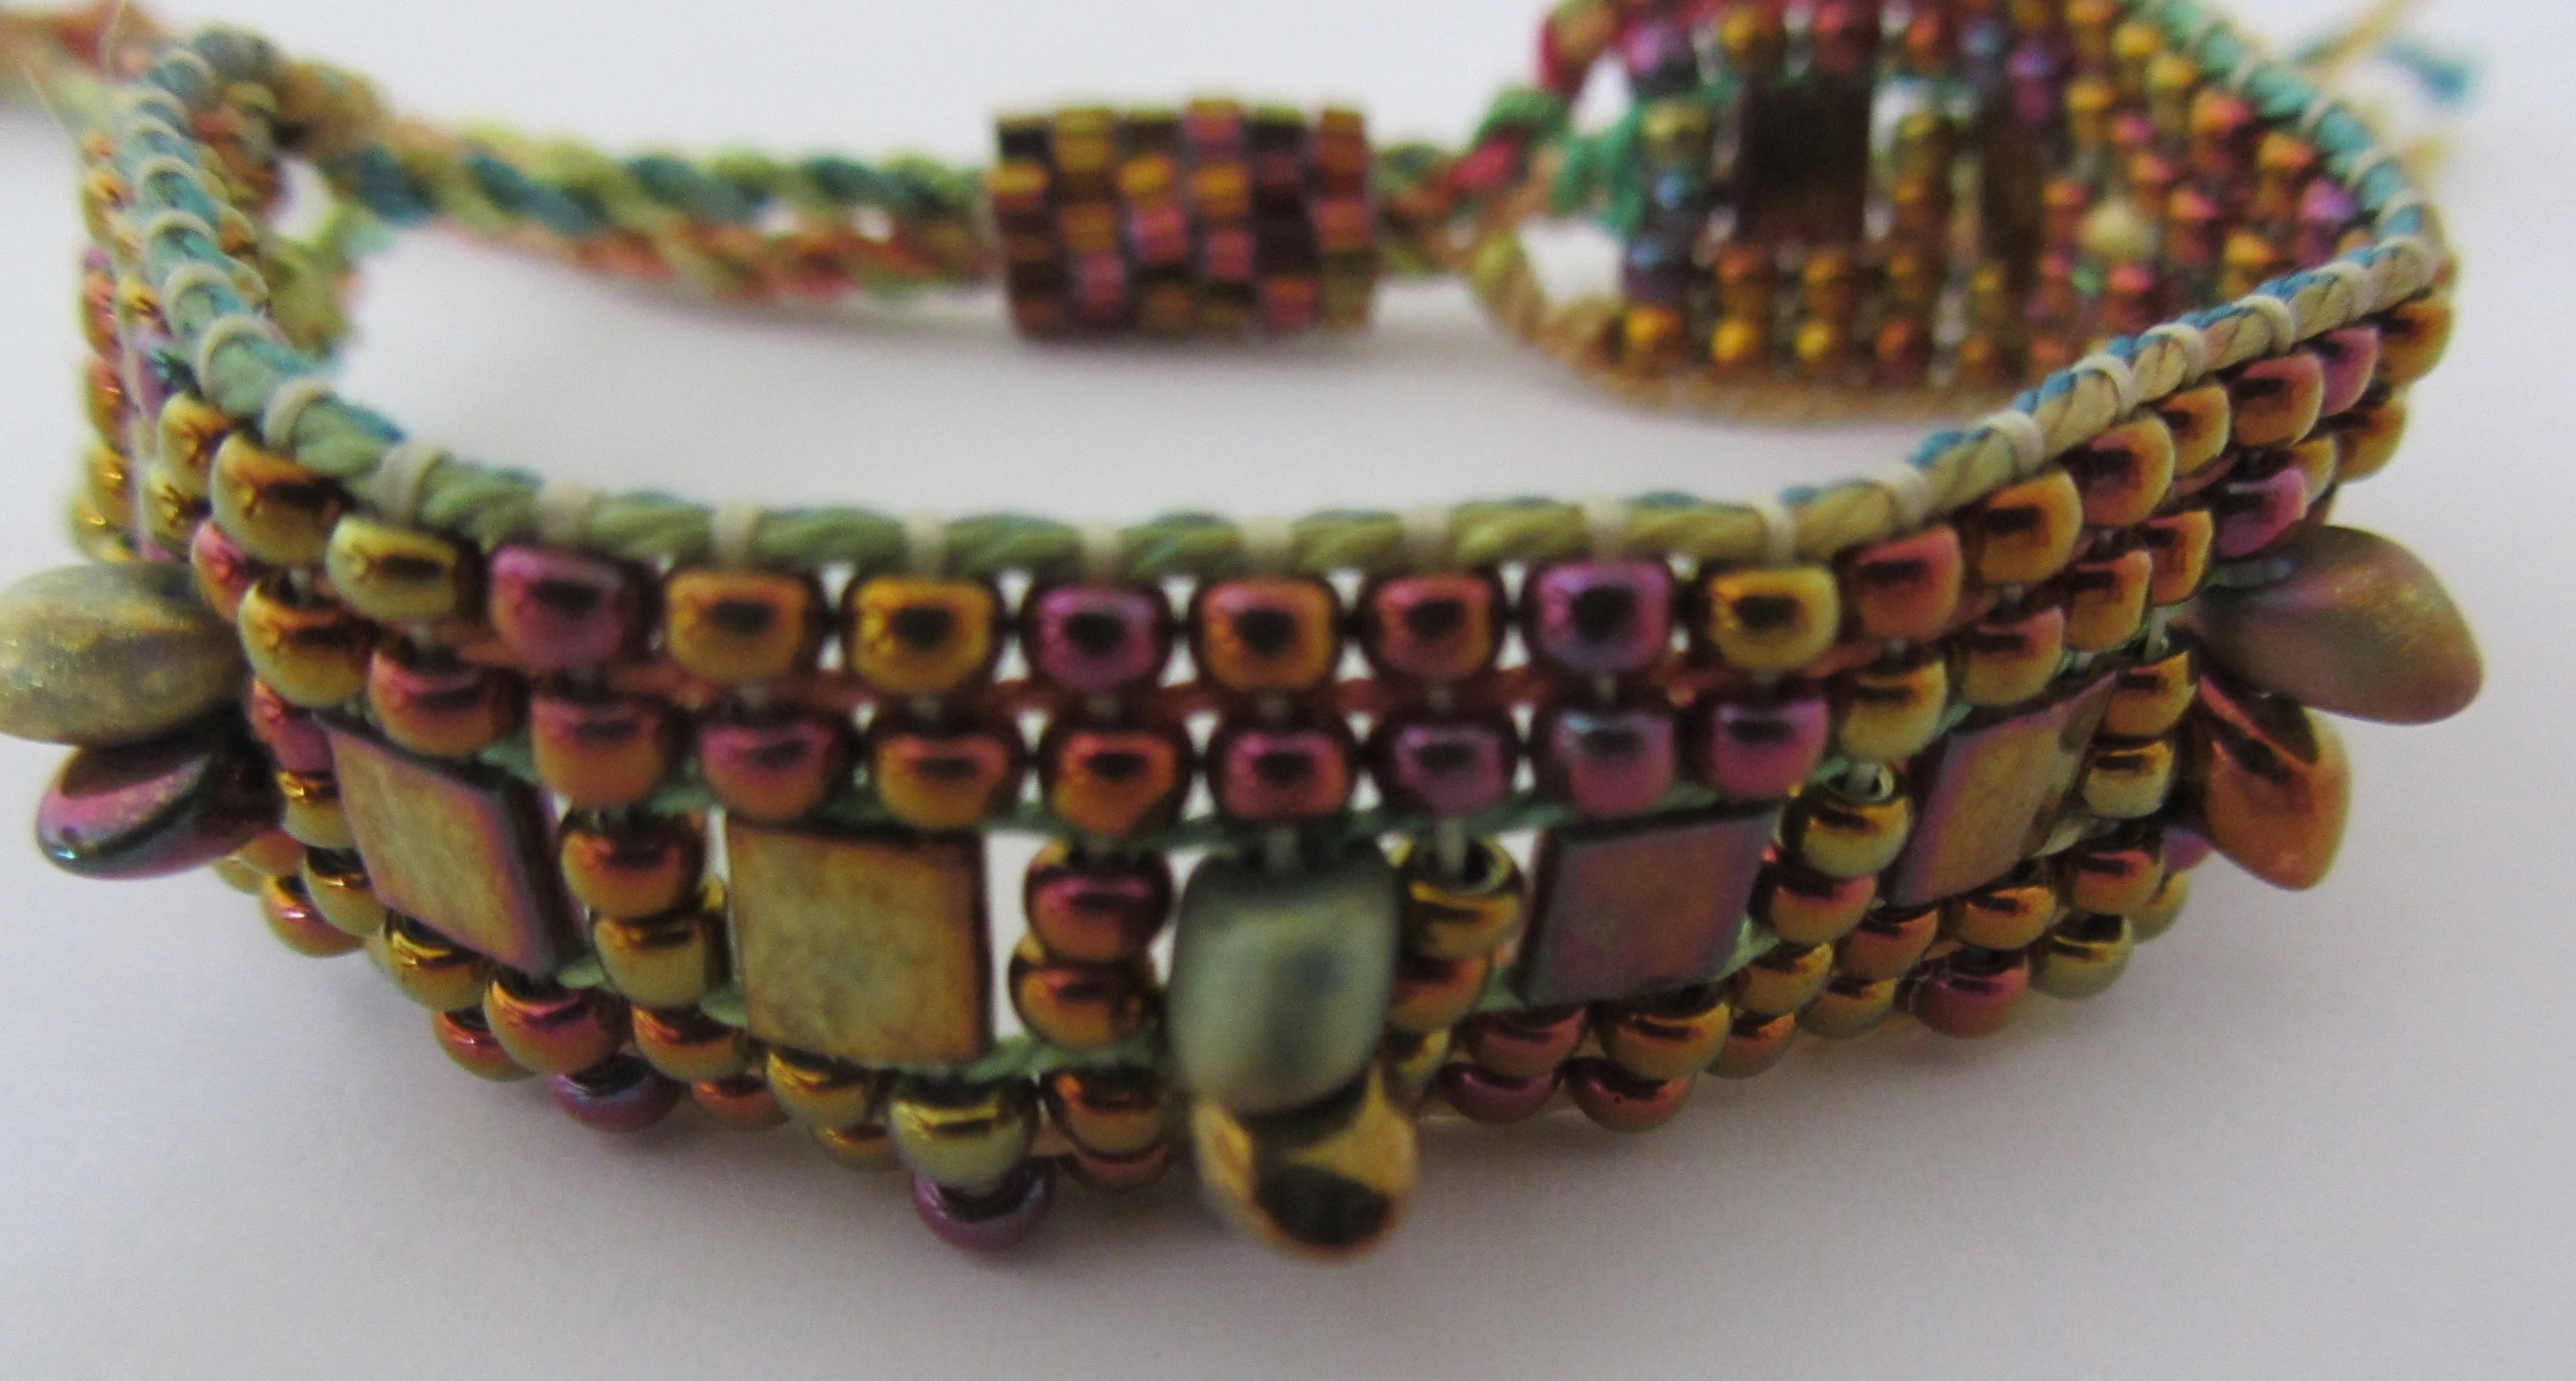
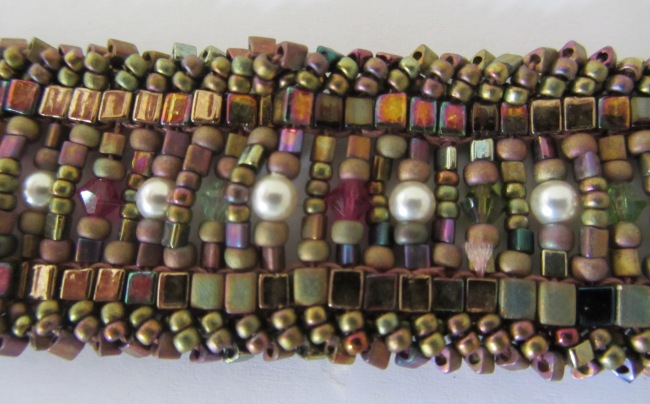
Wow, this is an old one.  The loom held four warps (which surround the square beads).  The trim on the ends (three size 11/0 beads) was put on as I wove.  I then somehow crossed the interior beads, which are all strung at once.  The warp was something fairly heavy like C-Lon beading cord 135.  I don’t know why it never became a kit.  Maybe it should!

ImageImage

This bracelet is similar to the one above, but the inside rows are not crossed.

ImageImage

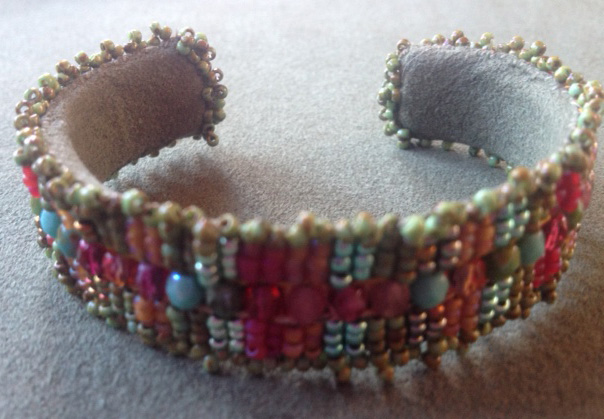
I had been making a bunch of bracelets to put on a brass cuff.  But with this one I lined the back with ultra-suede (gets rid of all those pesky warp ends in a hurry plus is very comfortable to wear).

ImageImage

This next one is a variation of the affinity bracelet theme.

Image

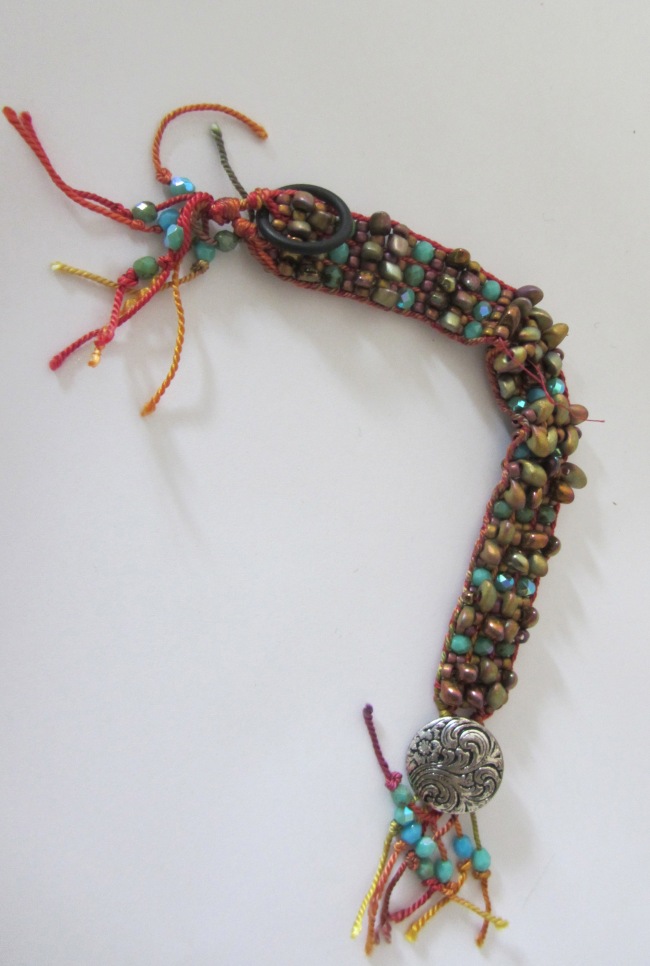
This funny little guy uses a silk covered O-ring as both button and closure.  I’ll try anything once.  I might even try this again.

Image

You know how much I love checkerboards!

ImageImageImage

This is my latest bracelet (I made it yesterday) and it might want to become a kit.  Bicone crystals on a hand painted silk warp.  A few knots, a few more crystals, the usual hand painted silk covered O-ring (as well as warp) and pewter button.  I think it took me an hour to weave and about twenty minutes to finish.  Fun and easy.  Should it become a kit?

ImageImage

Checkerboard Cuff Bracelet

IMG_3268

When we go to bead shows, we like to bring along a lot of samples of projects made on Mirrix Looms. One sample that always gets a lot of attention is a former kit, the Pastel Checkerboard Cuff Bracelet. For one reason or another (probably having to do with the availability of certain beads) we stopped making the kit. Recently we decided to bring back this old favorite in slightly different, more vibrant, colors.

Claudia loves the permanent galvanized beads and the great colors of this versatile cuff.

This project is great for any level weaver! The pattern is easy and fun and you’ll love the results. The holidays are coming and we know there is someone on your list who would love this hand-made (by you) bracelet!

checkerboardcuffbraceletkit

Buy the kit here, only $59!

Holiday Gift Mirrix Looms Bead Weaving Class: December 8th, 2013

If you live in the Boston area, you are in for a very special treat. Mirrix President Claudia Chase, the owner of NOA Gallery Joni Parker-Roach and artist and teacher Alexia Rosoff will be teaching a one-day bead weaving workshop on Sunday December 8th, 2013 at NOA Gallery in Groton, MA outside of Boston.

Students will learn how to warp and weave two stunning crystal and bead wrap bracelets. This is the perfect class to make some gorgeous hand-made gifts for those you love the most (or keep one for yourself)! These same bracelets are sold by Claudia in galleries for hundreds of dollars each.

wrap bracelet on hand

Where: NOA Gallery in Groton, MA

When: 9 am- 5 pm (with a break for lunch that can be worked through)

1069884_10151692966923186_1095243158_n

What:  Students will learn how to warp a Mirrix Loom with gorgeous hand-painted silk, the basics of weaving beads, the method for weaving different sized beads, tips on combining colors, how to finish a wrap bracelet and much, much more. They will make two stunning “Crystal and Bead Wrap Bracelets” made with 8/0 and 11/0 seed beads, fire-polished crystals, hand-painted silk, porcelain beads and finished with pewter buttons.

four bracelets

Why: Because you deserve a day of pure fun and creativity and this is the perfect chance to check a few more people off that holiday gift list! Plus, you’ll learn how to weave beads on a Mirrix Loom, a useful skill that will  open up for you a whole new world of weaving.

57

How Much: $150 plus $59 materials fee ($10 off the original price of the kit) and $20 loom rental fee which can be used towards the purchase of your loom!

Kit Includes: 

crystalbeadandwrapbracelet

-25 grams of 8/0 seed beads
-25 grams of 11/0 seed beads
-12 grams of 4 mm fire-polished crystals
-12 yards of hand-painted silk
-A bobbins of size D C-Lon beading thread
-13 round porclain beads
-2 peweter buttons
-1 long Tulip beading needle
-1 short beading needle

All in a lovely reusable plastic box
Makes two bracelets

How:
Email elena@mirrixlooms.com to reserve a space in the class. We will accept payment by check or PayPal.

*After November 15th there will be no refunds, class will be cancelled by November 15th if we do not hit our class minimum
*Maximum class size of TEN people

Easy Beaded Leather Wrap Bracelet

A few months ago I bought some leather cord and was playing with wrap bracelets on my Mirrix. I was playing with the idea of using wire to string the beads and trying for really easy, fast projects. These were my results:

http://blog.mirrixlooms.com/2013/04/17/wire-suede-another-20-minute-bracelet/

http://blog.mirrixlooms.com/2013/04/16/the-20-minute-bracelet/

After that I warped my loom for a thicker wrap bracelet, but it was one of those projects that just sat on my loom. Yesterday I finally decided to re-warp and try a more traditional wrap bracelet. It was so fast and easy to do this on a Mirrix Loom! I chose some pretty 8/0 beads and crystals and tied off with a  pretty glass button and that was it! And, hey, when you can buy an even simpler wrap bracelet for $200… this is a pretty good deal!

pastelwrapbracelet


It’s a new weave-along: The Crystal Cuff

Crystal Cuffs

Concept: The concept of a weave-along is simple. Once a week on Sunday during the span of the weave-along participants receive an email from us going over (in detail and with pictures, descriptions and sometimes even video) the steps of how to make a particular project. The project is split into seperate parts, each part being a different email, allowing participants to work on the section detailed in the email sent on Sunday during the following week.

Typically we archive weave-alongs, but this one will NOT BE ARCHIVED and will only be available “live”. This doesn’t mean you can’t save your emails and work at your own pace, but it should encourage you to work at the pace of the weave-along.

A very important aspect of the weave-along is the social aspect. Each week we encourage you to ask questions, to share pictures of your progress, to answer questions and to interact with other participants on Facebook, Ravelry, Twitter (hashtag #weavealong10) and via email (if you aren’t a social media user we’d be happy to post your pictures and progress for you!). A weave-along is meant to be an online re-creation of a class with friends. Learn, share and be inspired! When you sign up, we ask you to click “YES” and agree to “Participate, ask questions, etc.”. Please do, and help make this weave-along a more social experience for everyone involved!

Project: The Crystal Cuff is a gorgeous bead and crystal bracelet on a resizable brass cuff.

Get $5.00 off as a weave-along participant (for those of you who have already signed up before we have the kit available, we will email you your discount codes when the weave-along launches)

What do you need? Any size Mirrix Loom, a Cyrstal Cuff Kit (or similar supplies) (CUFF KIT COMING SOON)

Sign-up here


Three new bracelets

I decided to revisit the beaded cuff design and ramp down the number of colors as well as simplify the pattern.  This is not quite as interesting to weave as a more colorful piece with several or more bead and crystal shapes, but still fun to weave and finish and I really like the final results.

Crystal Cuffs


IMG_2866

Here is the trio!

IMG_2867

This one is made of gold finished beads only.  Some are rose gold, some are iris gold, some are pink or yellow gold.  The shapes are all round and the sizes range from 15/0 to 11/0 to 8/0.  The fire polish crystals in the middle are 24 karat gold plated (and yes, they cost a fortune!).

IMG_2868

This piece combines  rhodium plated size 11/0 Delica beads with fire polish crystals and size 11/0 beads for the sides.

IMG_2869

The last in the trip is again all gold but this time a combination of Delica beads in both rose and yellow gold finishes.  The crystals are swarovski in colors in the rose, purple, green range.  The trim beads are 11/0 and 15/0 round beads.

What follows are some more angles on these three bracelets:

IMG_2874

IMG_2876

IMG_2878

And lastly, the wrap bracelet revisited with pictures on an arm and spread out.

IMG_2872

IMG_2860

IMG_2859

IMG_2857

IMG_2856

More Beaded cuffs and a wrap bracelet

I have been busy.  I have been knocking off three of these a day.  The thing I love about bead weaving (besides the fact that I love bead weaving) is that it is not hard on my hands.  Eventually, every other craft I do starts to anger my hands and so I have to stop.  I can weave on a loom all day (with breaks of course to stretch, etc.) but my hands never get tired.

We plan to create an amazing kit that will include beads and basic instruction for a variety of cuff and wrap bracelets.  I have run up the Mirrix credit card buying every bead and crystal I can find that I love and all these will go into the kit.  So be watching for it.

Meanwhile, some eye-candy to get you inspired!

photo copy 5


A stack of Cuffs: size 8/0 and 11/0 beads and 4mm fire polish crystals woven on a hand painted silk warp and attached to a brass cuff with an ultra-suede backing.


photo copy 6

photo copy 7

photo copy 8 photo copy 9

photo copy 10

photo copy 12

photo copy 13


About twenty inches of beads and crystals woven on a hand painted warp with a button an o-ring finding.  It wraps three times around your wrist.

photo copy 14

photo copy 15

photo copy 17

photo copy 18

photo copy 19

photo copy 20

photo copy 21

photo copy 22